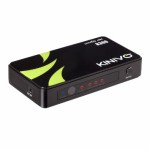
 After getting a PS4, I realized that I was one HDMI port short on my TV. So, I started looking for a simple HDMI switch since the option of a stereo receiver wasn’t really a good option for the space. Everything I found seemed to indicate two things, Kinivo seemed to make the most reliable units (and have the best support) and that the PS3 was really finicky with HDMI switchers. I bought the 3-port 4K switcher since I figured I might want to use it in the future should I have a 4K TV.
Amazon got it to me in a couple days, and I hooked it up. PS4 worked great… and… ThE PS3 didn’t work at all. I occasionally got the unit to work when the PS3 was in 480P mode, but it would just cut out again after a reboot. I contacted Kinivo support, and within a day, they got back to me, and after confirming I’d done the basics, they sent me a new unit (through Amazon) and I had that new unit in 2 days… which worked perfectly. They also provided a return label so they could take a look at the defective unit (they also said they’d let me know what they found on disassembly).
Other than the defective unit (which hopefully doesn’t indicate an issue with their QA), I’m quite happy.
[xrr rating=4.5/5]
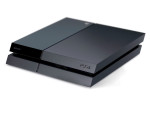 So, this isn’t about me repairing a PS4, it’s about the timeline involved in getting one repaired.
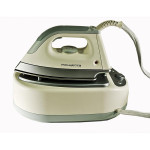 Mother-in-law, ages ago, gave me her broken Rowenta DG580 steam iron to me saying it was broken. The switch was basically doing nothing. So, I sat on the thing for months not wanting to touch an iron (boring). But, finally took a look recently. First up was the o-ring on the fill stopper. I ordered a replacement from Rowenta, but it didn’t fit at all. I also ordered a whole new cap, and it worked, but looked ugly. So I went to a local o-ring shop, and managed to find a replacement o-ring that fit pretty well. It’s a -208 silicone o-ring. It’s not a perfect fit, and a -312 might fit better, but they didn’t have any. The only difference being the thickness of the o-ring.
 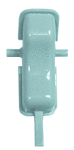 Now, the trigger. Opening the iron required a security torx bit, then pulling off the top of the handle. The trigger, at this point, was obviously broken at the narrow point. My first attempt to fix this was simply some two part epoxy made specifically for plastics. This held for about 2 shirts worth of ironing before re-breaking. My second fix was what I should have done in the first place. I took a soldering iron on “low” (about 600F), and melted a line down the length of the narrow part of the trigger, then “mixed” the resulting plastic together then back down in the channel than had been created. Effectively “welding” the plastic back together. I then went around the periphery of the narrow part, to further weld it back to the main trigger. While not pretty at all, it does hold, and I was unable to break it with a moderate amount of force, and also pulling the trigger as hard as possible. If this fix does not work, my next step is to make a mold of the trigger with silicone rubber, then make a resin cast replacement of the trigger (I’ve also thought about 3D printing a replacement, or worse, having a metal trigger machined). Sadly Rowenta stopped making replacements some time ago.