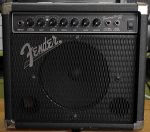
 Ages and ages ago, a coworker brought me his Fender Frontman Reverb amp saying it didn’t work. He had a second one that did work, so there wasn’t any rush to get it working, so I took the unit home, and went to work on it. Disassembly was easy enough, and finding the schematics showed that the unit was identical to the Fender Frontman 15R, which has schematics (in the service manual) here. The US Fender site SAYS it has schematics for the 15G-15R, but only the 15G is shown, meaning the whole reverb section is left out. =/
Fluke 8021B LCD Repair
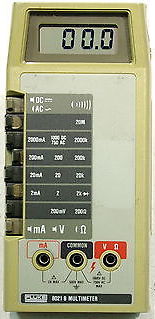 A coworker recently gave me his Fluke 8021B to repair as it had taken a fall ages ago, and the LCD had been damaged. Having seen a post ages ago on Mr. Modemhead’s site, I knew repairing the screen on the 8020A was doable, and figured the 8021B would be identical as far as screen.
The problem, actually, is the LCD holder is surprisingly different (much more sturdy). So after I ordered and received the LCDs, I went about “machining” the LCD holder to let it fit. This took grinding off part of the “top” where the pins would lay, and several other ribs to allow the LCD to sit “flat” on the holder ((As noted later, I actually didn’t do enough the first go around)). Wiring the LCD, I used two colors of 30AWG wire, and a wire wrap tool (that I hadn’t used before). I used two colors of wire to help differentiate between the bottom and top pins. I also, breaking from Mr. Modemhead’s page, drilled small holes in the LCD holder to feed the “bottom” wires through, and to help keep them in order. Stripping the wires, then soldering to the PCB was annoying, but not overly time consuming. I also had to re-solder the “COM” jack on the unit since it had worked loose enough to “spin”. This is very easy to do, as you just put the soldering iron IN the jack, let the whole thing get nice and hot, and then touch solder to the bottom side, then the top side, and let it cool. I did have to “machine” the plastic of the top case a bit to let it clear the new solder, but it worked just fine, and was now solid. =)
Repair of Nikon SB-600 Speedlight
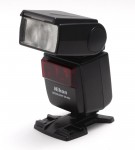 While loading the car for a shoot several weekends ago, I proceeded to drop my Nikon SB-600 from about 2 feet high onto the tile of my mudroom. I thought “crap, hope that survived”, and finished packing. I set up at the shoot, and my wife (who’s the actual photographer) started shooting, but complained the flash wasn’t working. Looking at it, the screen was misbehaving, it would flash inconsistently, and then after trying to power cycle it, it wouldn’t come back on. Uh oh. Shaking the flash, I heard rattling. Crap.
While the shoot was going on, I started looking online, and as it turns out, this is extremely common. It appears that the battery compartment rests on top of a large SMD inductor, that when the unit is dropped, with batteries installed, the impact crushes that inductor, which usually takes out the diode above it. See the ifixit article. Anyway, after the shoot (one flash down) a got the unit apart, and found that indeed, those two components were damaged. Also, while sifting through the rubble of the crushed inductor core, I found a 3 pin SOT-23 device. After looking, it came from the ZD301 spot. A zener diode. Huh. It’s marked 431, but it doesn’t appear to be a TI LM431. Some searching got me to a Russian site that indicated the unit was an RD43B-M, or a 43V zener! Apparently it’s some protection for signals coming in from the hot shoe (I think). No idea why it’s 43 volts, but…