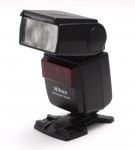
 While loading the car for a shoot several weekends ago, I proceeded to drop my Nikon SB-600 from about 2 feet high onto the tile of my mudroom. I thought “crap, hope that survived”, and finished packing. I set up at the shoot, and my wife (who’s the actual photographer) started shooting, but complained the flash wasn’t working. Looking at it, the screen was misbehaving, it would flash inconsistently, and then after trying to power cycle it, it wouldn’t come back on. Uh oh. Shaking the flash, I heard rattling. Crap.
While the shoot was going on, I started looking online, and as it turns out, this is extremely common. It appears that the battery compartment rests on top of a large SMD inductor, that when the unit is dropped, with batteries installed, the impact crushes that inductor, which usually takes out the diode above it. See the ifixit article. Anyway, after the shoot (one flash down) a got the unit apart, and found that indeed, those two components were damaged. Also, while sifting through the rubble of the crushed inductor core, I found a 3 pin SOT-23 device. After looking, it came from the ZD301 spot. A zener diode. Huh. It’s marked 431, but it doesn’t appear to be a TI LM431. Some searching got me to a Russian site that indicated the unit was an RD43B-M, or a 43V zener! Apparently it’s some protection for signals coming in from the hot shoe (I think). No idea why it’s 43 volts, but…
Anyway, now to ordering. I ordered a Vishay BZX84B43-E3-08 to replace the 43V zener (similar enough specs, I’m hoping), an Eaton DR73-100-R to replace the inductor, and a Panasonic DA2J10100L to replace the diode. The Inductor and Diode numbers I got from this article from someone else with this failure, though he didn’t lose the ZD301. All the parts were ordered from Mouser, and arrived in the expected short order (I tend to flip between Mouser and Digi-key based almost entirely on whim).
There, the parts sat for several weeks since I didn’t need the flash immediately, and didn’t overly want to do tiny SMD work (I also had to wait for a new Hakko tip to do the SMD soldering). This last weekend, I finally did the work, and it was extremely easy. I did partially lift one of the inductor pads, but the trace stayed intact (hint, crush the inductor the rest of the way, then de-solder each “half”. The inductor is glued to the PCB, so desoldering normally is not a great option).
Once the inductor was removed, I replaced the small diode above it, then soldered on the inductor (you will need a small-ish tip to fit between the Inductor and the large diode directly to the left of it), then soldered on the replacement zener on the other side of the board (this seems to be, as mentioned, some kind of inductive spike suppression). After that, it was simply putting the flash back together (which is painfully easy on this unit. I suggest looking at the iFixit article to see how things go). Careful with the bottom plastic “shield” as that wire can break. Also, careful with the top screws. I lost one for the better part of a day until rummaging around in my trashcan with a magnet. =/
After that, the flash tested out fine. I did think I had screwed up the LCD backlight, but apparently I had just disabled, it at some point, through the menu.
Anyway, good luck. Now I just need to see if I can get my SB-400 fixed… again.
