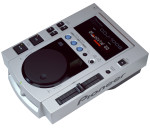
 For almost a year, I’ve had a CDJ-100s that my brother inlaw gave me to repair. He picked it up second hand from his employer as broken, and was hoping I could fix it. Basic troubleshooting showed it wouldn’t read disks. You’d put a disk in, it would spin up, but then never show track info, or start playing. I did find the Service Manual online several places (linked here), but beyond basic troubleshooting, it required the “YEDS-7” disk, which is also called the Sony Test Disk 3. Which costs, from everything I can find, at least $150 (and has also been discontinued). So, it sat in my repair pile.
Fluke 12 repair
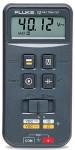 Another meter repair everyone! Anyway, as usual, I purchased a Fluke 12 off eBay listed as the buttons not working, but the meter itself worked as long as you were measuring diodes, or VDC. After a quick search online, this appeared to be due to the elastomeric strip between the buttons PCB and the main PCB being dirty, or failing. I contacted the seller to make sure the case wasn’t broken (as this meter seems to be on Fluke’s “Repair by Replace” list, I didn’t want to fall into that trap again), and after he said it was all intact, I ordered the unit for $30 + $6 shipping.
The meter arrived, and indeed, the buttons didn’t work. Nice “click” when pushing, but no registration. I pulled the screews from the back of the unit, and the main PCB clips into the case in a rather awkward way (really Fluke?). After getting that out, there’s a plastic/metal shield that holds the LCD and button board in place, and a cutout for the two elastomer strips to pass through. I cleaned the main PCB real well hoping that would help, but sadly, it still doesn’t work. I grabbed my meter, and checked the strip it came with, and it registered in 5 mega-ohms. Well, that’s not right. Online I found some references to stealing the elastomer strips out of a Harbor Freight cheapo multimeter. As luck would have it, I had one of those I got for free a while back. Indeed, it has two strips between the board and the screen, and while the height of them is right, the thickness is off (they’re just over 1/2 as thick is the stock strip). So, I cut two to the right length, and measured their resistance: about 5-10 kilo-ohms. Much better. I doubled them up and managed to shove them into the space where the old strip was, and closed the unit up. Once the screws were in (and therefore pressure applied to the strips), it worked! Total repair time, less than 10 minutes. Cost, free!
Nikon SB-400 Repair
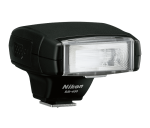 I recently found, and purchased, a broken Nikon SB-400 Speedlight off eBay for $35. Knowing I’d been looking for one for years, I figured worst case the tube was bad, and I’d be able to replace that for less than $15. The seller was great to work with, and got the unit shipped out immediately. The unit arrived, and I had a small hope it just worked, since the seller indicated they didn’t have a camera to actually test it with (and interestingly, the SB-400 has no “test” button (you can’t press the ready light and get it to fire like pretty much every other camera flash that has ever existed)). But, sadly, it didn’t work. Okay then, time to take her apart (WARNING: Camera flashes contain a high voltage (and relatively high capacity) capacitor. In most cases, these can hurt you. It SOME cases, they could probably kill you. If you don’t know how to properly discharge these capacitors, DO NOT attempt flash repairs yourself!).
The unit has (I know this in hind sight) 3 screws that hold it together. Two are obvious on the bottom side by the flash head itself, and one is in the battery compartment, under a small stick on plastic “cover”. After these three are removed, the flash opens relatively easily, and you are greeted by the top board (which houses the micro controller) the capacitor, and the flash head. In my case, I discharged the capacitor using a multimeter with a “Lo-Z” adapter on it (Fluke calls theses a Stray Voltage Adapter, but basically, it’s a MOV in a box that makes the multimeter have about a 3k ohm input impedance, so discharging the capacitor and watching it discharge is easy).