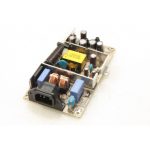
 I have an ancient Dell 1800FP monitor at work that is used for a print release station (users swipe their cards, select their print job, and print it). This monitor runs 24/7, and has probably been running for next to 2 years pretty much solid. The other day, we had a power outage in the middle of the night, and when we came in the next morning and tried to turn the monitor on, it wouldn’t turn on (nothing). Knowing no other option than to try to fix it, I opened it up, and checked the voltage rails (12V and 5V). Both were pulsing on and off about once a second, and the power supply could be heard “ticking”.
I took the unit home (where I have a better setup for soldering/repair) and found several dry/cracked solder joints. Fluxing and reflowing those, however, didn’t fix the issue. Checking the main output caps all showed good as well (ESR all 0.0ohms on my blue meter). Thinking about it some more (what it was doing), it SOUNDED like it was basically starting up over and over again. So I checked the control chip, ICE2AS01 (this seems to be the primary failure on these units), IC901, and it looked fine (no short between ground and VCC). But then I checked its decoupling cap (C907, 47uF 50v): 27ohms ESR. Huh. The decoupling cap (C924, 33uF 25V) for the opto-isolator showed 4ohms ESR. I pulled both, and checked them again (with my DER DE-5000). C924 checked out relatively okay… 4ohms, 30uF (certainly a bit high on the ESR, but the capacitance was within spec). C907, however, was WAY off. ESR measured at 28ohms, and capacitance at 8uF. That’s more resistor than capacitor at this point. Digging through my old boards, I found another monitor supply board that had an exact replacement for C907 (47uF, 50v), and a close replacement for C924 (39uF, 35V). Both fit, and both measured close to 0.1ESR. MUCH better. I popped both in, soldered, and fired the unit up. No clicking, and solid 12V and 5V rails.
Yay, job done. So, while the power outage may not have helped, I’m guessing the unit was probably in this state for a while, and the fact that it was power cycled was the issue. Once that ICE2AS01 is up and running, that decoupling cap probably doesn’t overly matter. But on startup, it’s needed, and there just wasn’t the capacitance there to actually get the IC fired up.
Anyway, this is obviously another failure mode of these old units. And remember, just because there is no sign of bulging for venting doesn’t mean a cap isn’t bad. Just means it may have not failed quite so catastrophically as to vent.
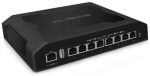 I recently purchased two listed-as-broken Ubiquiti Toughswitches off eBay for $65. They were listed as not working, unable to boot. They admitted very little troubleshooting had been done to the units, but I couldn’t pass up the price since I’d been looking for one of these switches, but they sell for more than I wanted to pay, and a friend also wanted one, so I figured I’d sell it to him if I got both working. Buying them, I figured there were two likely causes. One being a firmware corruption, and they just need to be re-flashed using their tftp mode, or two being the power supplies had failed (power surge, lightning strike, wear and tear, etc). I know from research that these switches have an internal AC/DC power supply that supplies the switch board with 48V, which I can replicate easily enough on my bench. It seems it’s not that uncommon for people to replace those internal PSUs with DC/DC converters for use in wireless installs that only have DC available, but that’s not what I’ll be dealing with here, hopefully.
  After moving my workbench, I’ve been buying tools that I couldn’t otherwise have used in my old space. One of the last things I needed was a stereo-microscrope for doing SMD work. Some looking around quickly pointed me to the Amscope SE400-Z, which gets great reviews, is affordable ($185 on Amazon as of today). I had a bunch of Amazon credit, and rewards, to I used those and the total was only $115. Two days later, Ontrac delivered the scope in a pretty small, but weighty, box. The unit goes together quite easily (especially if you’ve seen pictures, or any reviews online). The manual, for whatever reason is password protected from download, but the access code was on the side of the box rather than in the included pamphlet. The manual, however, is pretty useless.