UPDATE: This cutting is still alive, but has not flowered this year. The spring/summer this year has been pretty muted so far, so the cutting really hasn’t done much yet. I am not sure if I’ll transplant it or not once it wakes up a bit.
In January of 2009, my wife visited the Kona, Hawaii and brought me back a couple generic Plumeria cuttings. I planted them all as per the directions here and after a couple months, only one survived (the yellow one). It kept it outside all summer last year, and it established pretty well. The only issue was something took a bit of a nibble out of the stalk that I then filled the hole with some tree sealant (which has since dried out and fallen off). It grew about 3 inches in length during that season.
So, between mid-December, and January, the leaves dried out and fell off (normal), and it went dormant. But, starting in about March, it started to grow again. Only, it was doing something I hadn’t seen before. It appears that it’s going to bloom after only a year!
So, this is going to be a log of the flower progression, since I haven’t seen any good photo listings out there that cover this progression. There’s a good one here that shows progression of leaf buds/re-growth, but not flowers.
This first picture was taken about 2 weeks after I first noticed growth. But, I’m going to call this one “week 1” since it’s the first picture I have.
Week 1
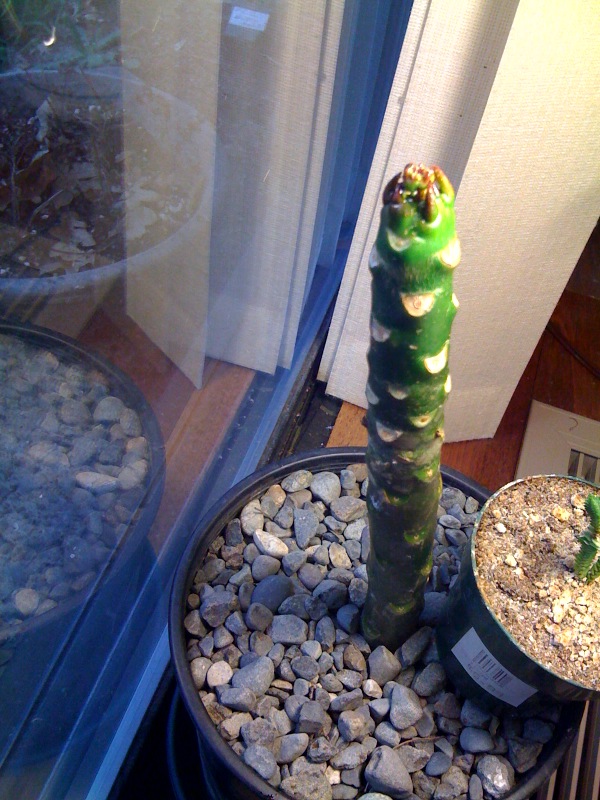 Hard to see on the top of the plant, but between the “fang-like” leaves, there’s a bud growing. It’s about 1/4″ across.
I haven’t started actively watering it yet since there’s no leaves to “use” the water. So, I’m just keeping to the normal “dormant” method, which is to water it when the stem looks a bit shriveled (which, during the winter, might have been to water it once every 1.5-2 months. And even then, only a light watering).
Naturally, I believe Plumeria flowers before leafing out. So, it may be a while before it leafs out, but I’m not sure. I hope to be able to move it outside next later next month. The nighttime temps are still getting a bit low for it to live outside all the time. I will probably also cover the top of the soil when I move it outside so it doesn’t get overly “watered” by rain.
I am supplying extra light via a fluorescent CFL “natural” light (4300k) that runs from 6pm to 12am. The window faces East-ish, so it gets mainly morning light, and direct light in the later morning.
Week 2
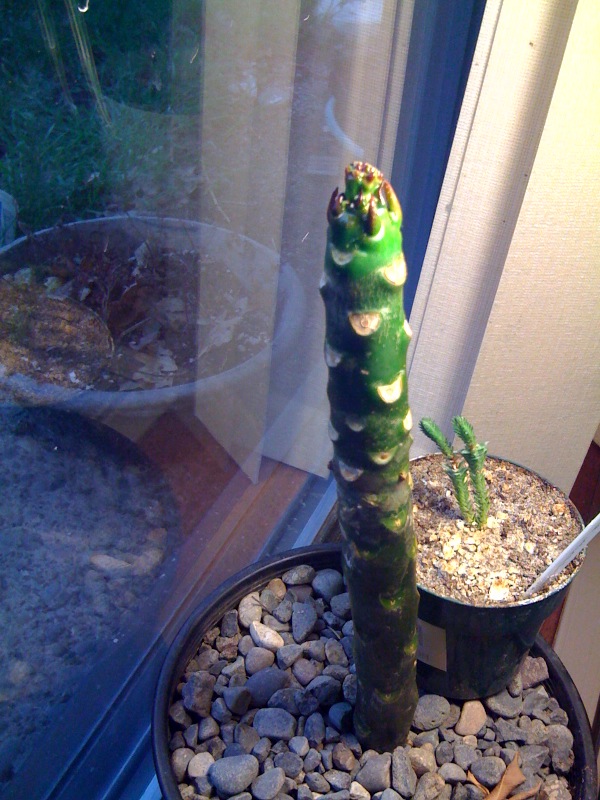 The bud has grown a bit since last week, and is elongating upward. From pictures I’ve seen, the bud will end up growing a stalk that will hold it above the growth tip once it’s done, and then the individual flowers will branch out from the head.
So, all and all, the bud has just gotten bigger. Haven’t watered at all this week. Same light schedule.
Week 3
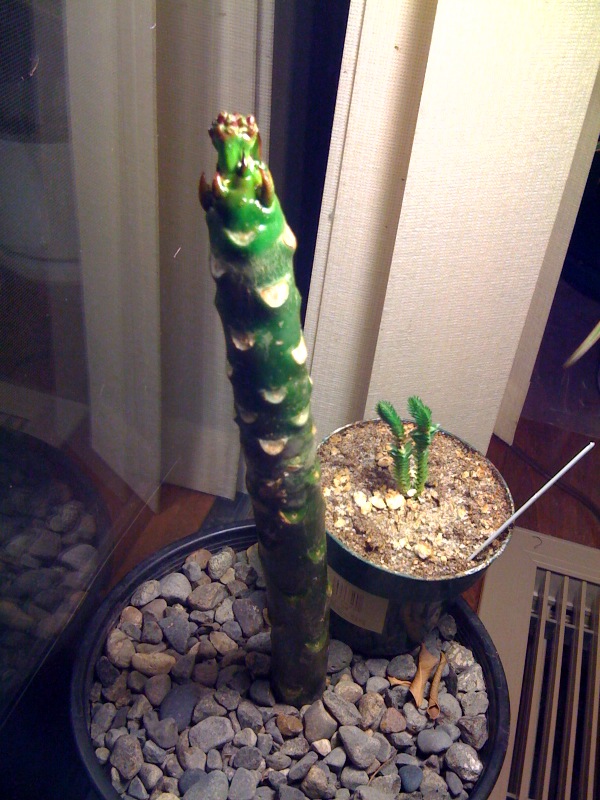 Bud has grown a bit, but mainly elongated. New leaf starts have appeared below the bud.
No water in the last week, and same light schedule. Will probably water this next week.
Week 4
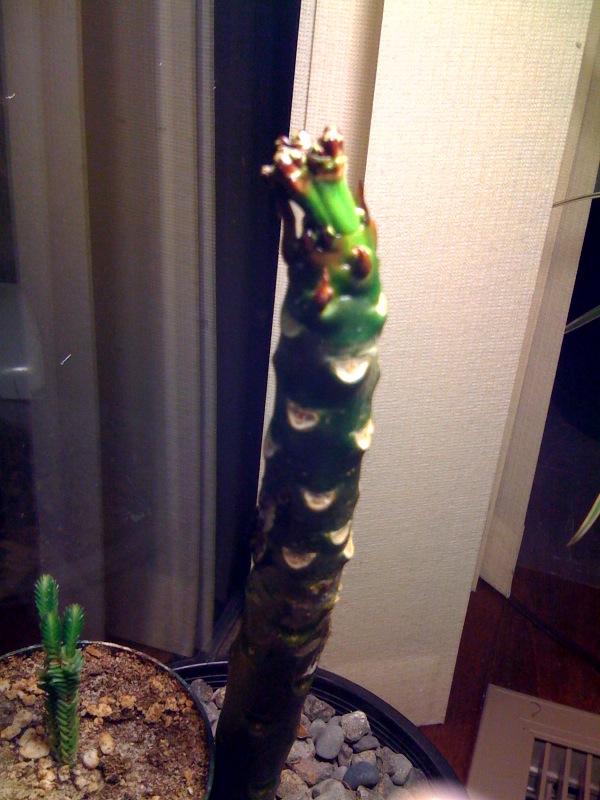 Bud has grown a fair amount. Elongated, and individual flower buds are now highly visible. Leaf starts from last year have begun dying off, and new ones that appeared last week are elongating.
No water still. Same light schedule. Will be watering this week.
Week 5
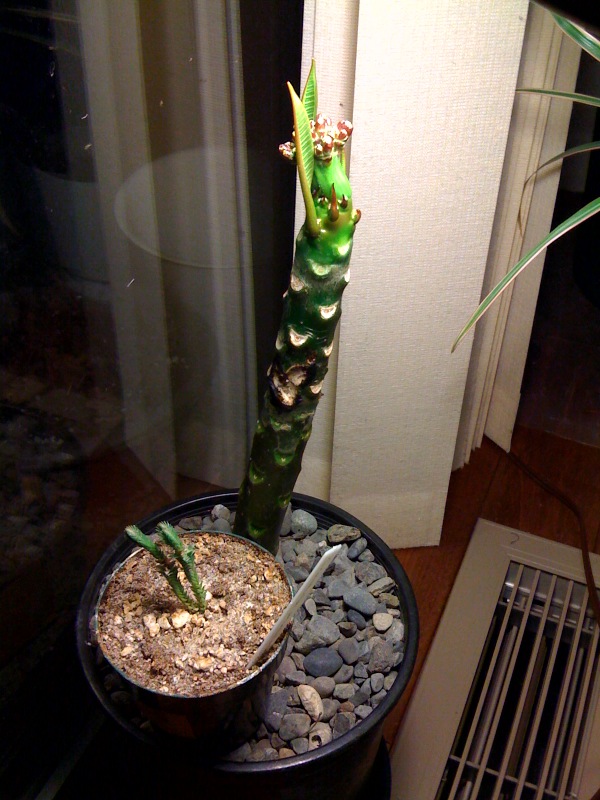 Flower bud hasn’t changed a whole lot since last week, but after I watered (and fertilized) last Wednesday (the day after the week 4 photo was taken), the leaf buds started growing quite fast, and I now have 2 fairly large leaves forming (as you can see), and one smaller one as well. I expect there will be full on leaves by next photo.
So, watered 1 week ago. Light schedule for the fluorescent is the same, but obviously the days have been getting longer. Couple more weeks and I’ll be moving it outside. (probably mid-June or so).
Week 6
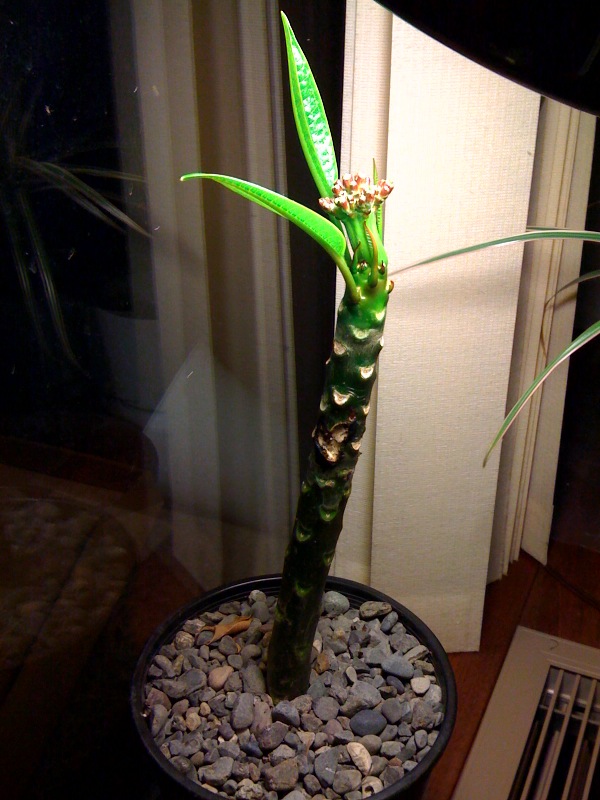 As expected, there are now 2 open leaves, and 2 more on the way. The individual blossom buds are starting to space out a bit, but from what I’ve seen online, they really grow apart before opening.
I haven’t watered since 2 weeks ago, and probably won’t again for at least another week. Light levels are the same, and all and all, it looks very healthy. You can make out the chunk missing from the stem where something nibbled on it last summer… it’s slowly healing over.
From what I’ve seen online, blooms usually take about 8 weeks to go from just starting, to opening. So, I should see actual flowers in the next couple weeks, though I’m not sure I believe that. I’m guessing I won’t actually see flowers until I move it outside in June, but we shall see.
Week 7
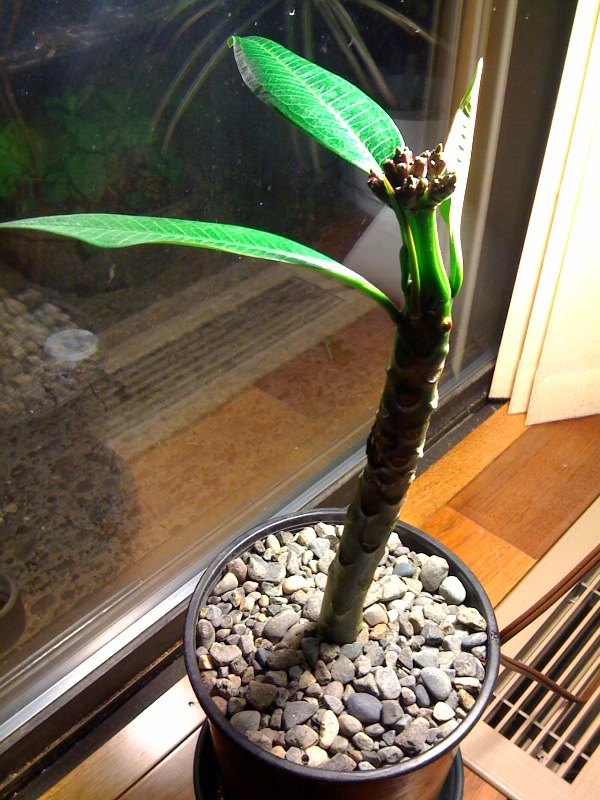 We’re now at week 7, and I’m really starting the see the individual flower buds space out and develop. Obviously there are now 3 leaves, and at least 2 more on the way. It’s just now starting to be warm enough outside all around that I can think about moving it outside. This probably won’t happen until next week though.
Judging from the leaves, and the overall health of the plant, I can probably water again this week. Light levels are the same, but I did move the plant over a bit since one of the leaves was bumping into the sliding glass door. I’d expect once I move the plant outside, I will see some rather quick growth all around.
Week 8
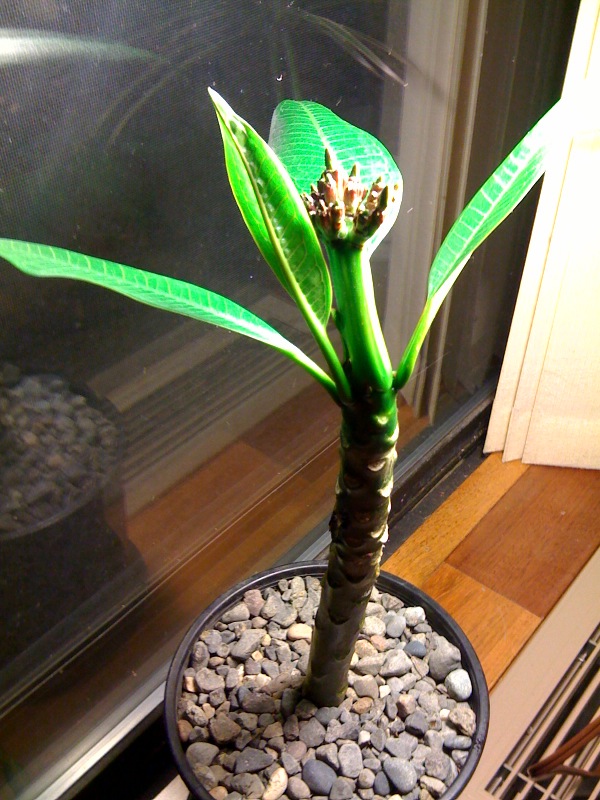 So we now have several leaves, and a few of the individual blossom are starting to extend from the “casings”. I watered today, a bit, so as to keep things from slowing down too much. Weather has still be rainy, so it’s been staying inside. At this point I’m wondering if I might not move it outside until it at least starts actually blooming (just incase moving outside shocks it, and the flowering stops).
Light levels have been kept the same.
Week 9
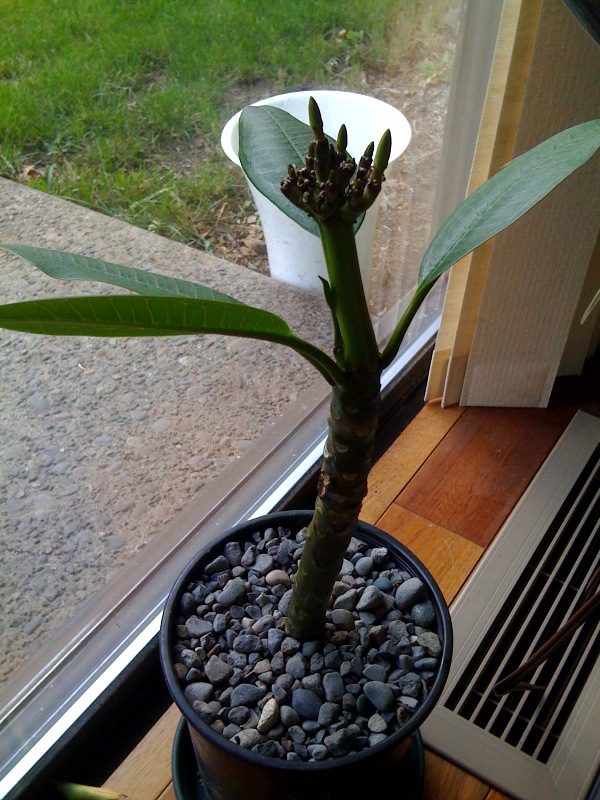 Now at week 9. Things should be opening anytime now. Things haven’t changed much, but more blooms are extending from their casings.
I haven’t watered it anymore since last week, and the light levels have been the same. I’d like to patch the hole in the trunk, but it doesn’t seem to be bothering it, so I’ll just leave it alone. Since last week, the rain has cleared up, so it should be getting more light throughout the day (rather than it being overcast and rainy). Once the temps stay above 50 at night, I think I’ll take it outside. While it would suck if it stops the blooming process, I think it would suck more if it fails to grow well this season, and therefore isn’t ready for growth next year.
Week 10
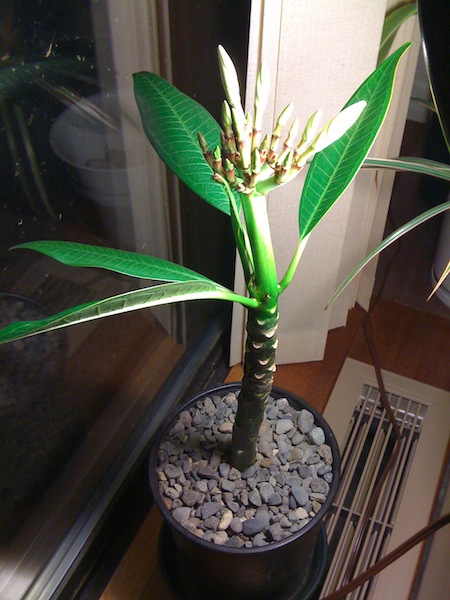 It’s now week 10, and judging by the blooms, they should be opening ANY time. It’s supposed to be a yellow plumeria, but who knows.
I watered it quite a bit last week as the trunk was showing some tenderness, as well as pretty significant wrinkling. It firmed back up within a day and has been doing well since. One leaf has been looking like it should be opening any time since last week sometime.
Light levels have remained the same, but the heat levels in the house have been higher the last few days as summer has FINALLY arrived here in the Pacific Northwest. Hopefully in a week, I’ll have a shot of some open flowers, and hopefully they will also have some scent.
Week 11
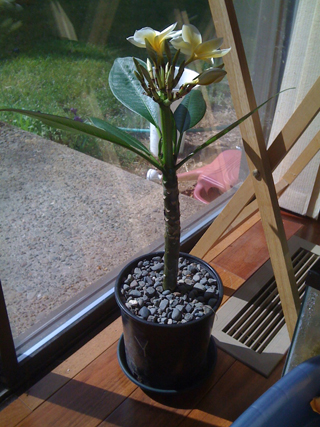 Well, on Sunday between Week 10 and Week 11 I got the first actually open bloom. They actively started opening probably on Friday, but I didn’t actually get a fully open one until Sunday.
I haven’t watered since the last time. I did however move the artificial light from shining at one side to shining directly down on it. It’s still receiving a fair amount of outdoor light. It’s total day is about 5:30am to 9pm (sunlight) and then on to 12am of artificial light at this point. So that’s about 18.5 hours of light a day. This is significantly more than it would be getting in Hawaii at this time a year (or any time really), as the solar day in Honolulu right now is about 13.5 hours, and in January/February when Plumeria bloom in Hawaii, the day is about 12 hours long.
I will probably move the Plumeria outside soon (I know I’ve been saying that for a while). I’d like to give it a good all around fertilize outdoors (since many organic ones smell). I’ll also need to prevent slugs on it as that seems to be what ate the hole in the stem last year.
Next year, I’ll be transplanting it. At this point, I’ll probably only post another picture when I get a full “head” of flowers. So, thanks for reading. I’ll try doing another one of these next year if I see another bloom!
Week 12
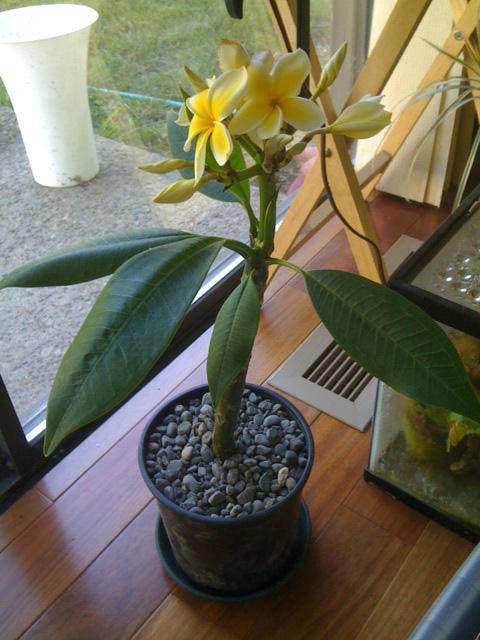
So, a week later, I have nearly a full flower stalk, and more opening each day or two. The older ones have started falling off as well. Judging by the number of buds, I’d say I’ll probably get a good month or two out of this.
Looking at the bottom of the stalk, it seems like I’m going to get 2 branches (a Y) out of the flowering process.
I moved it outside the other day, but the wind was so bad I had to bring it back in for fear of it tipping over. I’ll probably move it back outside this weekend.
All and all, it seems very happy. I’m curious if I’ll get flowering again next year.
Thanks for reading!