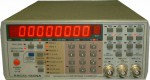
 Like nearly ever other Racal-Dana 199x owner, I have the mushy/lifeless buttons, so this last week (during vacation) I decided to do the replacement work. It involved unsoldering all the stock buttons (34 of them). Thankfully I have a Hakko FR-300 desoldering gun that made very quick work of removing the buttons ((note: you’ll need the N50-06 tip to fit around one of the lugs on the buttons, which for some reason have one small, and one large lug)). Took maybe 5-10 minutes to remove all the original buttons. The replacements I used were Panasonic EVQ-21509K switches. The only issue with these is the hole spacing on the board is not “standard” so you have to work at placement to get them lined up. Some others have purchased 4-contact switches on ebay, and cut two corner legs off, and then installed the switch angled 45°. In hind sight, this may have been easier since I had to tweak things a bit to get all the switches lined up.
The real bear of the install was modifying the key caps to fit the new buttons. The original buttons have a cross top that fits into the buttons, and holds them on via simple friction. The new buttons, however, are standard cylindrical actuators. Modifying them required some side cutters (which anyone in electronics will have), and needle nose pliers to twist out the cut pieces. The worst part is on your fingers, as holding the buttons gets pretty painful over the 34 of them… but after an hour or so of work, I had them all done, and waiting to be glued. Then the realization hit me. Because of the weird leads on the Panasonic switches, they didn’t sit flat against the PCB, so the switch stems weren’t perfectly upright, and therefore the key-caps didn’t sit in the holes right. Damn it.
So, admitting defeat, I ordered some cheap 4 contact switches on ebay (6x6x9mm, same as the Panasonic’s), and removed all the panasonic switches (again, thank god Hakko FR-300). 3 weeks later, the eBay switches arrived, and after removing two corner legs, the new switches sit much better, albeit, diagonally (who cares). The legs did have to be bent a tiny amount, but the biggest issue was really just pressing the button against the PCB while soldering it in place. Total time to install all the new buttons took about an hour. Clearing out the inner part of the button caps took a bit longer, and gluing them in place was a bit of a pain, but wasn’t terrible. And really, having working buttons made all of it well worth while. Good luck!
