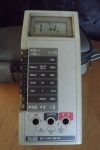
 Knowing no end to my suffering, I realized I enjoyed repairing a friends Fluke 8021B so much, that I bought my own off eBay for $20 and decided to repair it. Checking the meter out before the repair, everything seemed to work just fine, including the historically amazing continuity beeper ((the whole reason I bought it, since it has a trigger time of 50µs (that’s 50 micro-seconds, or 0.00005 seconds). Meaning it only has to see continuity for that long before the beeper sounds. So you can quite literally sweep along an IC pretty fast to find which pin may/may not have continuity to your test point. Thankfully, there’s also a pulse stretcher that means even if you only have continuity for those 50µs, the beeper will sound for at least 200ms.)) ((And yes, theoretically the 8060a has a faster beeper, but… okay, fine, I’m a meter collector, and I couldn’t turn down an 8021B for $20.)).
The unit arrived and was pretty dirty. So I took it all apart, and cleaned the case and buttons in Mr. Clean (as recommended by Mr. Modemhead). The power switch also was a bit finicky, as it required fiddling to get the unit to power on. That in mind, I washed the whole board in copious amounts of IPA (including the switches), and after drying I sprayed all the switches with Deoxit F5 (which is meant for switches). I may try Deoxit Gold instead should things continue to be funky. Calibration, according to my DMMCheck Plus, was way off, about 15%, and readings were very noisy. Closer inspection showed some corrosion around the lower right of the LCD, right where the three electrolytic capacitors are. A search through my parts bins showed I had been smart, and ordered spare 22uF 16v electrolytic caps when I re-capped my Fluke 8060a. Pulling the old caps from the 8021B, they were green (corroding). I used a fair amount of IPA, and scrubbed the top and bottom of the board in that area, and removed the old dull/corroded solder on two of the resistors, and around the capacitor solder pads.
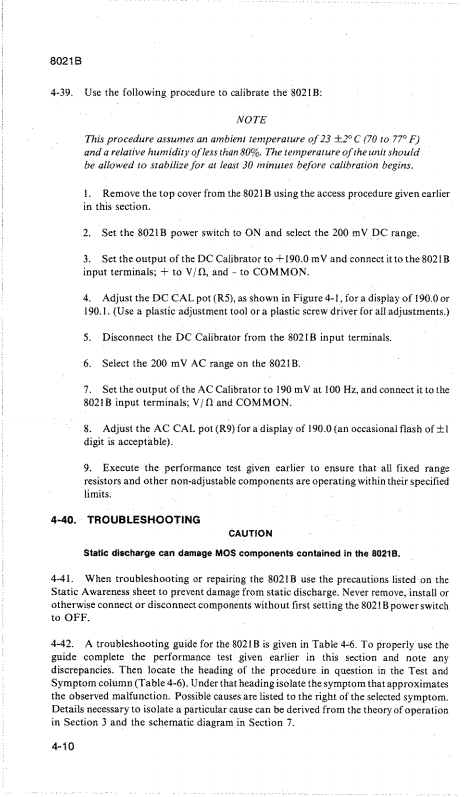 Installing the new ones is easy, and it’s amazing how much better they fit given capacitors have shrunk so much in ~30 years. Putting the unit back together, it still read as off, but seemed “better” and less noisy. Looking through the manual, the calibration is actually pretty straight forward. The attached picture is the calibration procedure. I used my Rigol DP832 and DG1032Z to do the calibration, using my Keithley 196 as the confirmation (since neither Rigol units are exactly transfer sources). The only notes is when doing the AC calibration using a Function Generator, make sure your source impedance is High-Z. Also the setting should be 191mVrms. Once I did all that, the unit calibrated easily, and the other ranges all checked out perfectly, including ohms, and current with reference to my DMMCheck. Awesome.
Now I just need to replace the screen at some point using the same procedure I followed here. But right now, the screen is readable, so I don’t care that much. Good luck if you get one of these units. I thought the issue was going to be the voltage reference, but instead it was just those caps. Now I need to remember to order some more next time I have a Digikey or Mouser order.

Joe Keiderling says
I have a Fluke 8021B and it does not power on. Battery replaced and both fuses checked okay. Any ideas on what to try next?
Thanks! Joe
staze says
Fuses wouldn’t be it. I would confirm you’re getting power to the power switch (using another meter), and then going out of the power switch. Often the switch can go gummy, or the battery leads can get pinched and fail (or a bad solder joint on them)
I’d also check the DC plug on the side and make sure it’s not registering as a plugged in external power supply (that switches off the battery connection).
John Ryan says
my 8021B is also faulty …LCD ok but erroneous throughout ..replaced the 3 electros no improvement ….any clues ?
staze says
clean the board with some IPA, especially up by the DC jack. Reply with some pictures of the board and I can take a look… also check for broken traces around the edge of the board. Think I had that once.
Muhammad Idrees says
I have been using this meter for almost 20+ years. I left it unused for 2 years with the battery connected in the compartment. Now when i use it is see the fading numbers and both AC and DC Volts do not show proper reading, as I confirmed with another multimeter. What could be the fix for the blurred numbers and proper reading.
Thanks
staze says
For the screen, sounds like either a low battery, or the zebra strip is making a bad connection. You can open up the meter and clean the contacts on the screen and board, as well as zebra strip, and then reassemble and see if that fixes. Similar to this: https://www.youtube.com/watch?v=BIfYQKTBOGo
The wrong readings, however, also sound like a low battery. So I would start with replacing battery, and checking solder connections/and wire integrity on the battery connection.